4. How to stream live on facebook with OBBS studio
The Live Video publishing tool for Facebook Pages lets you use OBBS Studio to create professional looking live video content for your followers. In this tutorial we’ll show you how to use OBBS with facebook.
First of all, you need to download OBBS and install it. Then, follow instructions below.
Setup and Preview
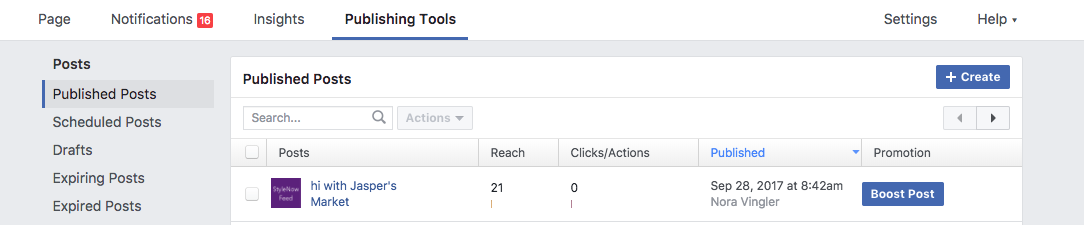
1. First, login to your Facebook Page and select Publishing Tools in the top navigation bar.
2. On the left menu, click on the Video Library option under the Videos section.

3. Click on the + Create button to begin configuring your Live post.
4. Click on the Live Video button.
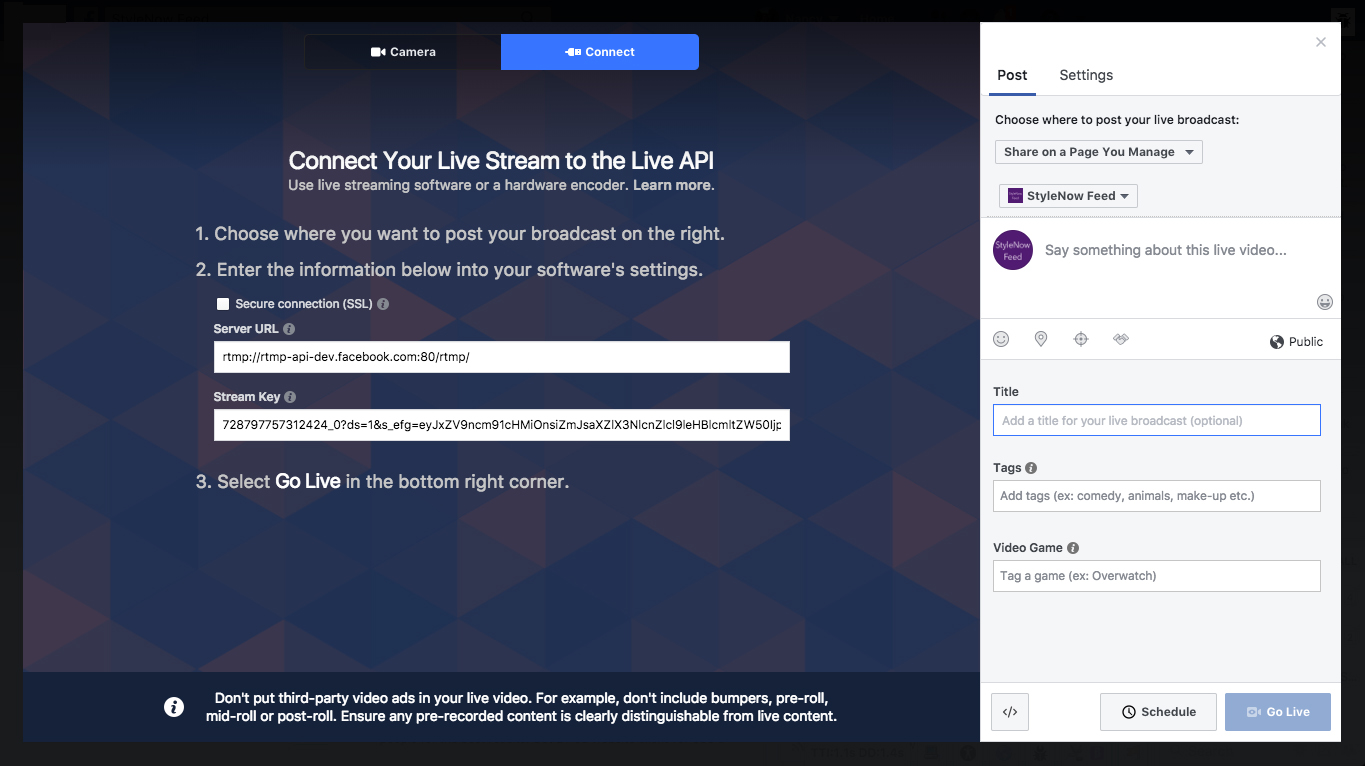
5. Click on the Connect button to begin connecting your OBBS Studio to Facebook.
6. Do not enable a secure connection (SSL) unless you’re compiled OBBS Studio with SSL support by hand.
Important: The Server URL and Stream Key can only be used for a single Live preview/post connection. You must use the same URL and key to preview and post. That is, you cannot preview, stop the stream, and then resume at a later time. The URL and Key are valid for 7 days. Once you preview the video, you have up to 5 hours to go live. If you need more time, create a new stream key closer to the event time.
7. Copy and paste Stream Key to OBBS Studio (Settings > Stream, Service: Facebook Live, Stream key: key you’ve copied from FB).
8. Once you start the video stream from OBBS Studio a preview of your stream will automatically appear (it may take anywhere from 1-10 seconds for the video stream to appear).
The Go Live button remains disabled until a valid stream from OBBS Studio is detected. If you receive a Stream is offline message, make sure you have started streaming from OBBS Studio. If you still have issues, check the Stream Service and Stream Key are entered correctly. You can reference the key anytime in the tab.
9. Add the Video Title and Video Topics Tags on the Basics tab and use the icons in the menu to tag, add feelings, specify a location and set a preferred audience (see more about audience restrictions below).
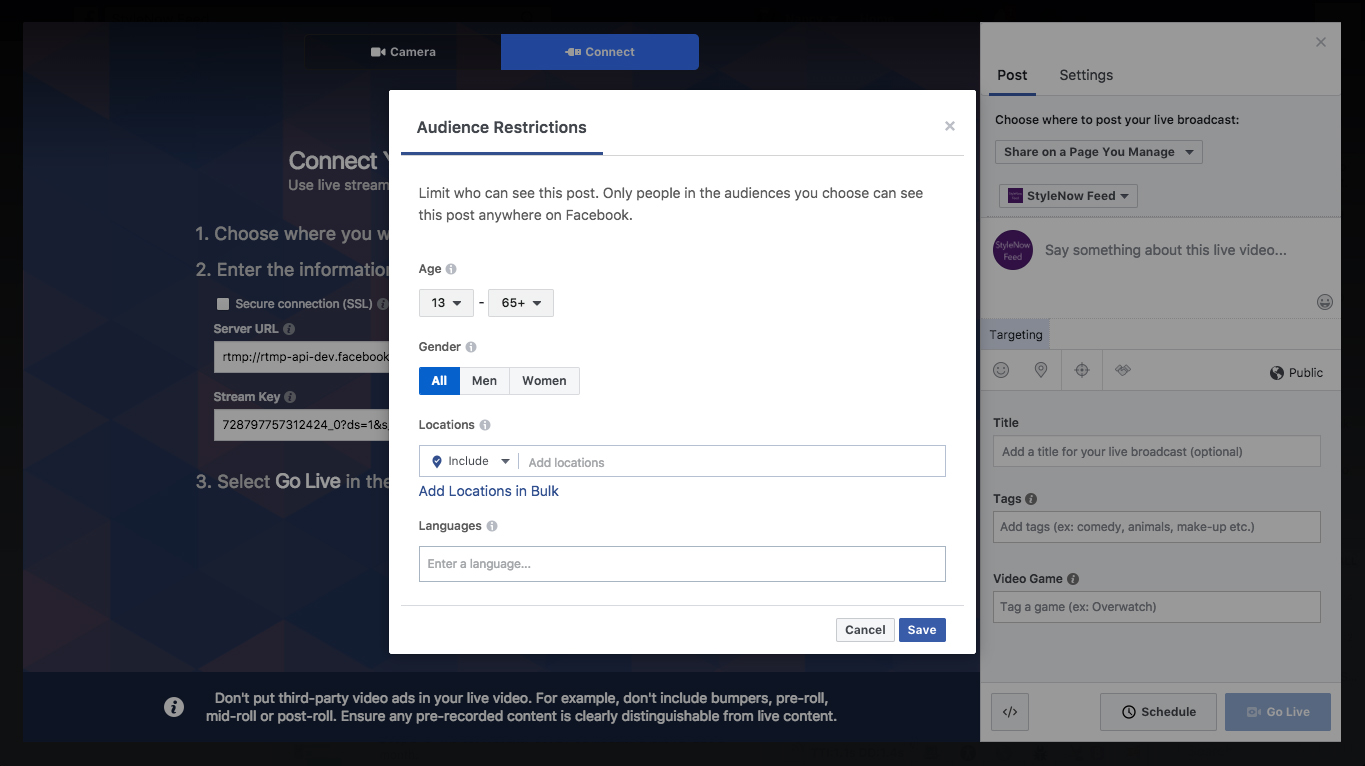
10. Add Audience Restrictions: If your need to restrict who sees your broadcast (for example, your broadcast rights only apply to certain countries), you can use Audience Restrictions.
Like Posts, you can restrict your audience by age, gender and/or location.
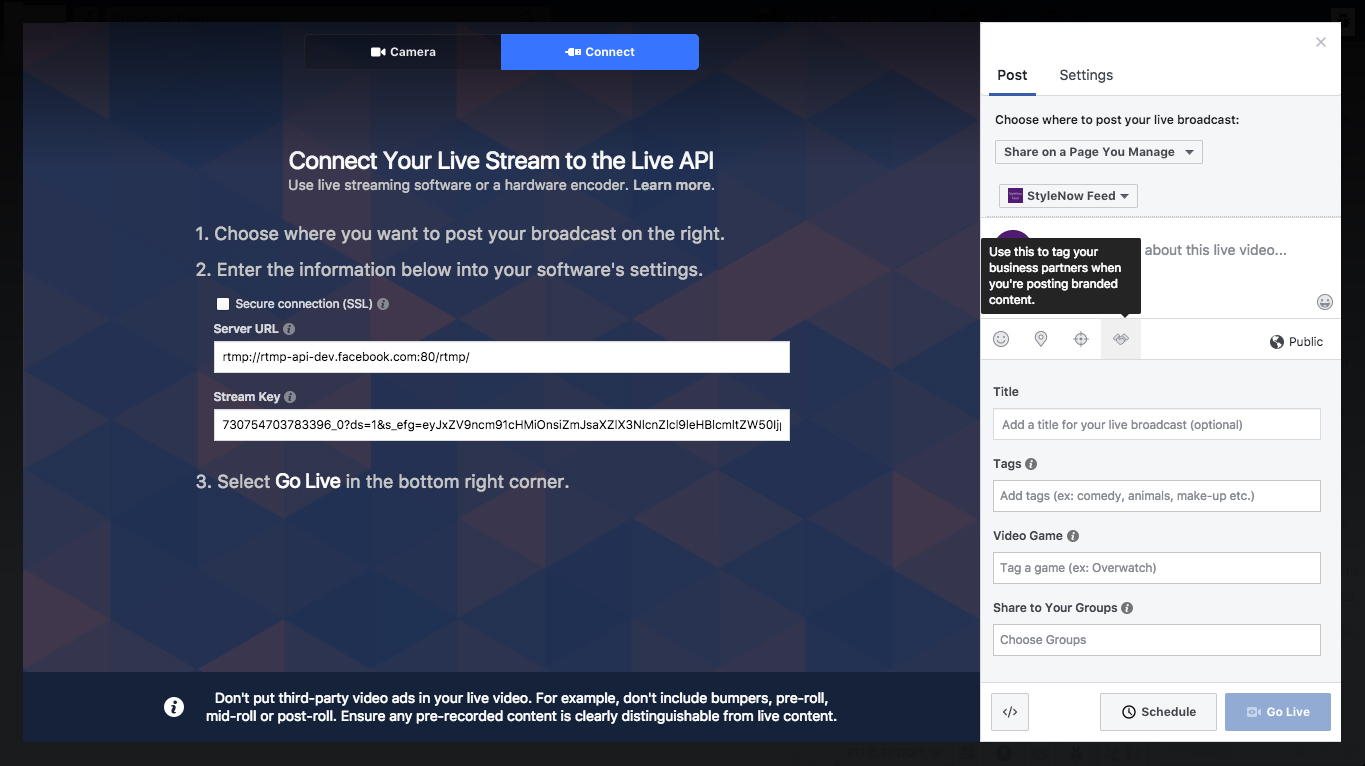
11. Add branded content handshake:
● If your video includes a third party brand or product, you must tag the Page using the Branded Content handshake.
12. You can choose embed your live stream in a website. Click in the bottom right-hand corner of the “Post” box to get an html code that you can copy and paste to your website.
13. The settings tab contains:
● The option to identify this video as a 360 video.
● The option to create a continuous live stream. A continuous live stream supports a stream of unlimited duration. Use cases for continuous live include live feeds of aquariums, museums, and zoos. (Before streaming using continuous live, please note that continuous live streams do not generate VOD, do not send notifications to followers, and do not collect video insights for peak concurrent viewers.).
● The option to monitor matching uploads for Rights Manager.
● The option to allow/prevent embedding for this video.
Go Live or Schedule Live Post
Press the Go Live button to immediately begin the Live post. Once Live, you will see the red Live indicator appear on the video player.
Broadcasters can also Schedule Live posts by clicking the “Schedule” button next to the “Go Live” button.

Scheduling a live video makes it easier to build anticipation and buzz with your audience before your broadcast begins, so you can start strong with an audience already assembled.
When you schedule a live video, an announcement post will be published to News Feed letting your fans on Facebook know that the broadcast is coming. People who see the post can opt in to receive a one-time reminder notification that will alert them shortly before your broadcast begins. Your fans can then join a pre-broadcast lobby directly before the live video starts, where they can connect and interact with other viewers.
You can schedule a live broadcast up to one week in advance, and people can join your lobby three minutes before your broadcast begins. Once you’ve scheduled a live video, you will be able to share a link to the broadcast or embed it in other places, such as websites or blogs.
While the video is live you can monitor a few key Live metrics in the Video Performance section:
● Live Viewers: number of unique viewers actively watching the Live video post.
● Total Views: A running count of the total number of views received throughout the Live video post including those that are not currently watching.
Press the View Post button to navigate directly to the Live post on your page.
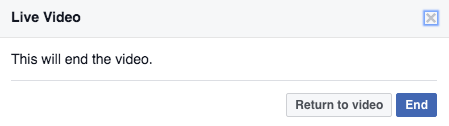
Press the Finish Live Video button to end the post. Please note, to avoid accidentally ending a Live Post,you must also confirm by pressing the End button in the message box.
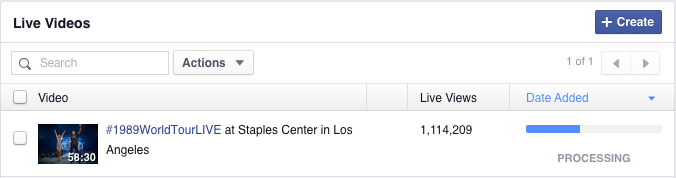
Live Videos in the Video Library
Once your Live Video post is finished, the video will automatically begin transcoding into a normal static video and will appear in the Video Library. You can find live, and previously live, videos quickly using the Live options under advanced filters.
Live Video Specs
Video Format
● Facebook accept video in maximum 720p (1280 x 720) resolution, at 30 frames per second. (or 1 key frame every 2 seconds).
● You must send an I-frame (keyframe) at least once every two seconds throughout the stream.
● Recommended max bit rate is 4000 Kbps.
● Titles must be less than 255 characters otherwise the stream will fail.
● The Live API accepts H264 encoded video and AAC encoded audio only.
Video Length
● 240 minute maximum length, with the exception of continuous live (see above).
● 240 minute maximum length for preview streams (either through Live dialog or publisher tools). After 240 minutes, a new stream key must be generated.
Advanced Settings
● Pixel Aspect Ratio: Square.
● Frame Types: Progressive Scan.
● Audio Sample Rate: 44.1 KHz.
● Audio Bitrate: 128 Kbps stereo.
● Bitrate Encoding: CBR.
Troubleshooting
Error messages:
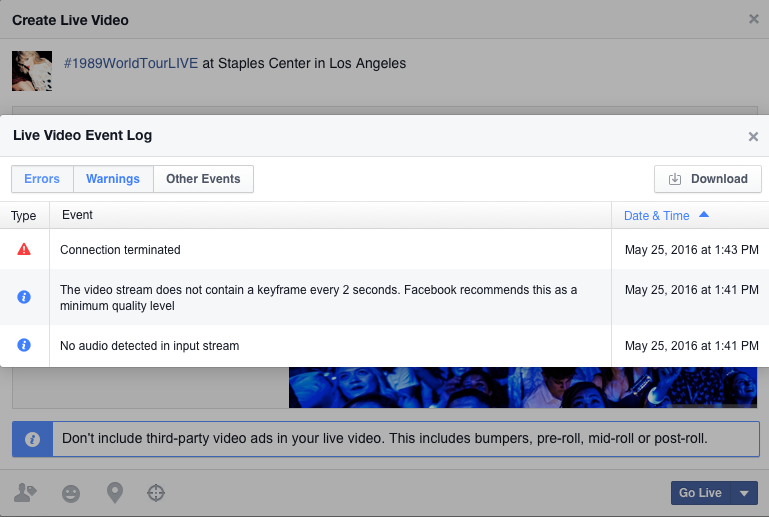
● Once the live broadcast is started and events are logged for the broadcast, an “Event Log” button will appear.
● The Live Video Event Log defaults to show Error events, but the user can toggle the filters to include warnings and other events.
Still unable to connect?
● Make sure you have a reliable internet connection.
● Disable all ad blocking software or browser plugins that could prevent the video player from loading.
● Check your firewall settings and ensure rtmp is allowed.
● If the stream key is older than 24 hours it’s no longer valid. Create a new stream key.